
I haven’t made a bag since my Q’Nique longarm followed me home a little over a year ago, but I decided it was time to make another one – a travel bag. I enjoy making bags, totes, and purses because I can make them in colours I like in styles I like.
A couple of years ago, I made a new travel bag for myself. In non-pandemic times, I travel a lot – up to 7 or 8 times a year between conferences and vacations, so I like to have a nice bag to take on the plane. The one I made was nice to look at, but I was never very happy with it. The pattern was a bit convoluted, which made it difficult to work with, and I messed up in a few places in ways that made the bag less than practical, like using the wrong type of lock closure on the main flap.
So, last week I decided that travels would come back again one day, and I really wanted a new bag. I decided on making this one from byAnnie.com, The Ultimate Travel Bag 2.0. (Not an affiliate, just a happy customer).
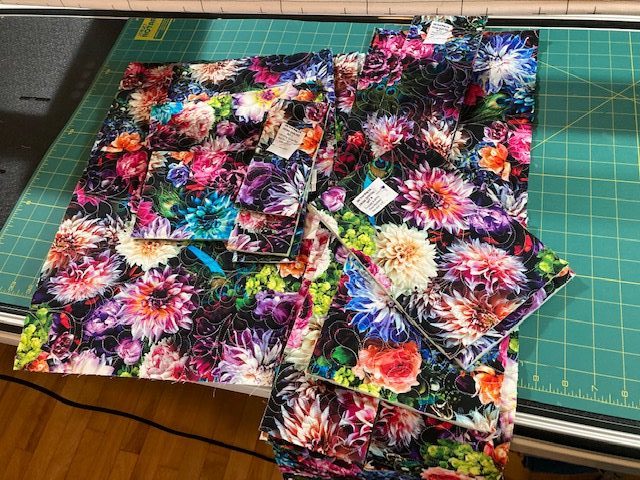
I had two sets of fabrics in my stash I liked and wasn’t sure which I preferred.
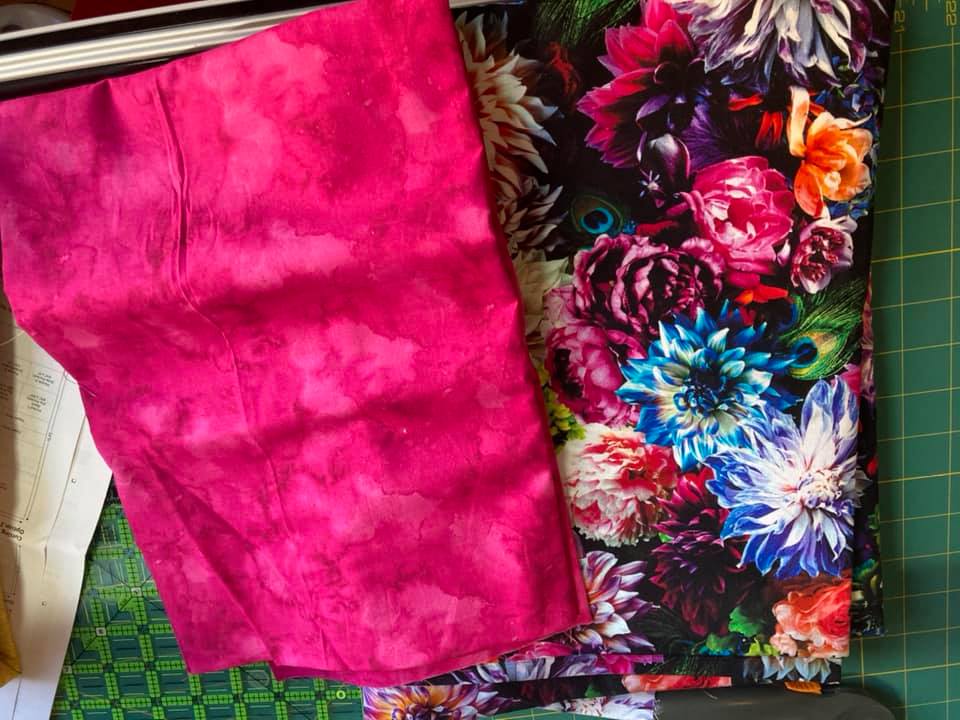
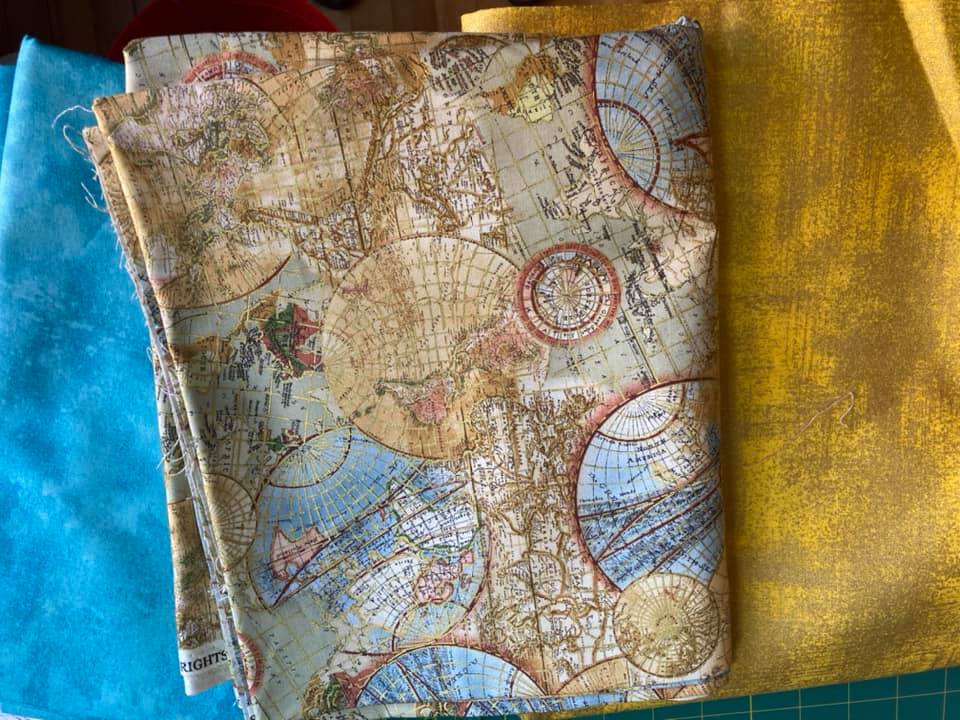
I love colour and I love having bright colourful bags, so I really leaned towards the first set. But I also like elegant and subtle, which is why I liked the second set. What to do?
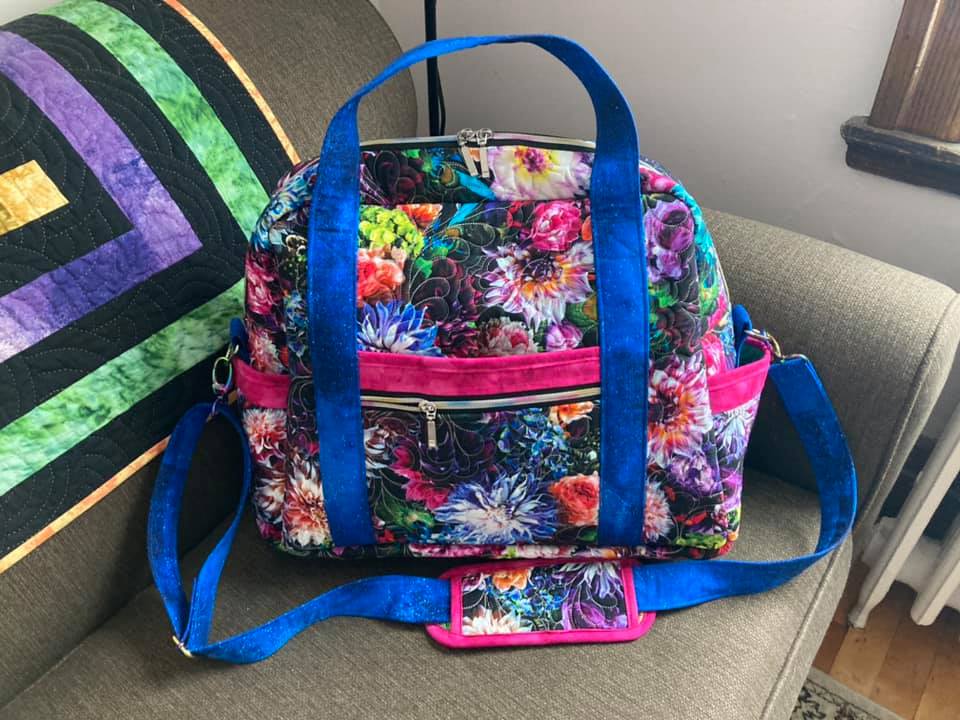
I decided to make both. This weekend, I finished the first one and I’m very happy with it. There are a couple of things I didn’t like and won’t repeat with the next bag.
First, what I liked about the travel bag pattern.
It’s well written.
I have followed too many bag patterns that are not well written and this one does not fall into that class. Very well explained, detailed. If I had any critique, I would have preferred a few more drawings or illustrations.
I am a very visual learner, so it’s harder for me to comprehend some steps by simply reading them. I found myself going back to the bag photo to see if it would help me understand a few things. But, that’s me. As I said, I really do better with visual clues. Not everyone is like that, so it’s not a complaint, just an observation.
Extra videos available
There are a few sections for the pattern for which there are videos on the site. These were great. I especially liked the one to help with the binding around the strap padding part.
The hardware is perfect
Some bag patterns seem to have hardware just for the sake of having it. There is nothing unnecessary with this pattern.
It’s a wonderful bag!
I just love how the bag looks. The trolley sleeve, the part that allows you to hook your bag on your luggage handle, was a huge plus for me. I only look for travel bags that have this feature. And this pattern made it much easier to apply than the other pattern I made.
A few critiques
Handles are too short.
I know there is a strap for shoulder or cross body, but I like to be able to tuck my arm into the bag handles, so these are much too short. Another 6 inches, minimum, would be better for me, so that was a bit disappointing.
No buttons on the bottom, please.
I wasn’t sure what I thought about the suggestion for putting buttons as purse feet instead of, well, purse feet. And I’m kicking myself for not following my gut. I don’t like the buttons on the bottom at all. I like my bags to look polished and this – in my opinion – doesn’t look polished.
The inside bindings are too narrowly cut.
I am very experienced with putting in bindings, but the binding cut is too small to comfortably and easily apply them inside the bag. Next bag, I will add at least a half an inch, if not more to the width.
Also, the instructions said to cut the bias binding in contrast colours. Since I didn’t realize that the binding was for inside, I did just that – I used my lovely pink contrast. Then I realized that the binding was for inside, so it should be the same as the lining (in my opinion), so I had to recut and wasn’t too happy about wasting the lovely pink. Yes, I could have put it inside, but I didn’t like the green/pink combo.
So, here is how I made the travel bag.
I will not be giving measurements or exact directions. Please support your favourite designers and purchase patterns you like.
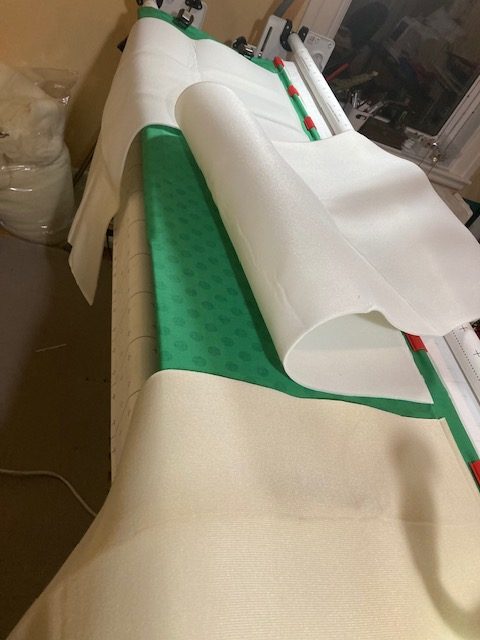
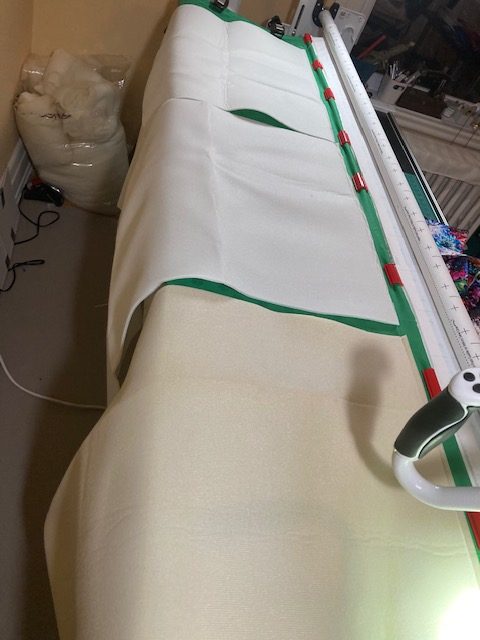
The pattern gives you two options for quilting the fabric together. (Note, that not all bag patterns use quilting. I’ve made many bags using just the stabilizer between the lining and outside fabric. But this pattern requires it) If you use a home machine, she suggests you cut out the pieces individually and then quilt them. If you have a longarm, she gives you the instructions for quilting a bigger piece of fabric and then cutting the pattern.
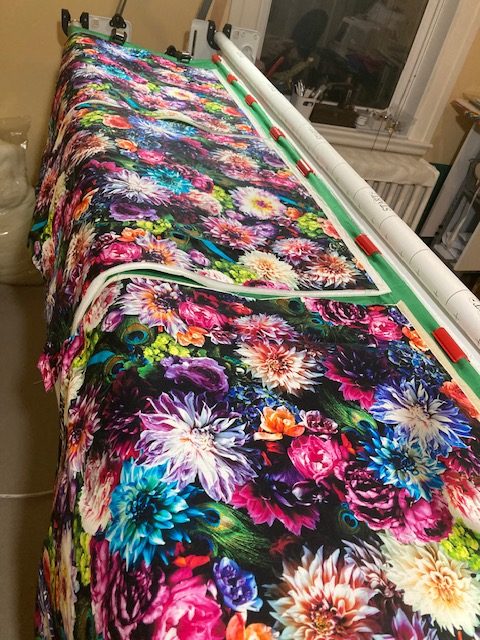
I picked my fabrics, loaded the lining as a backing. Added the Soft & Stable lining and then topped it with the outside fabric. I chose to do feathers as an all over pattern. I didn’t like the idea of straight lines or a cross hatch with such vibrant fabric.
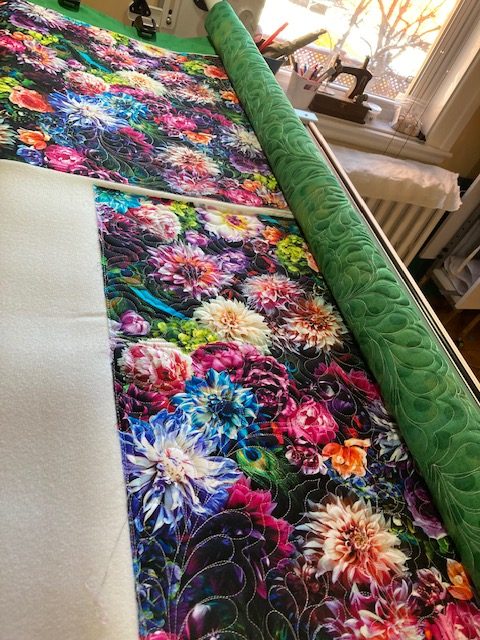
Now that the pieces were done, it was time to cut and start putting the pieces together.
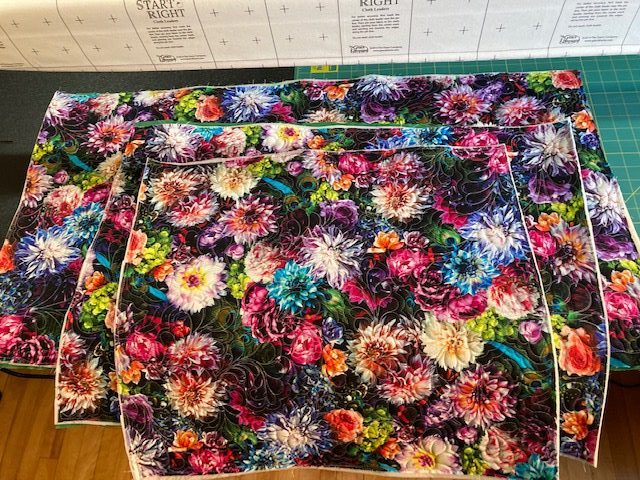

Take your time, read each section over a couple of times. There were a few times when I thought I knew what I was going to do and when I reread, I realized I had misunderstood. I made far fewer errors on this bag than just about any other one I made – and each time it was because I didn’t read thoroughly enough.
Some of the seams were quite thick but if your machine is in good working order, you should be able to manage. The sewing machine I had before this one did not like thick seams at all. It was a great machine, otherwise. I loved it for everything else it could do, but whenever I went through a slightly thick seam, the timing was thrown off each and every time. I finally bought a machine that could do the seams and sold the other one to someone who doesn’t sew things with thick seams.
Having a stiletto really helps a lot when guiding the fabric under the needle, especially in the harder to reach areas.
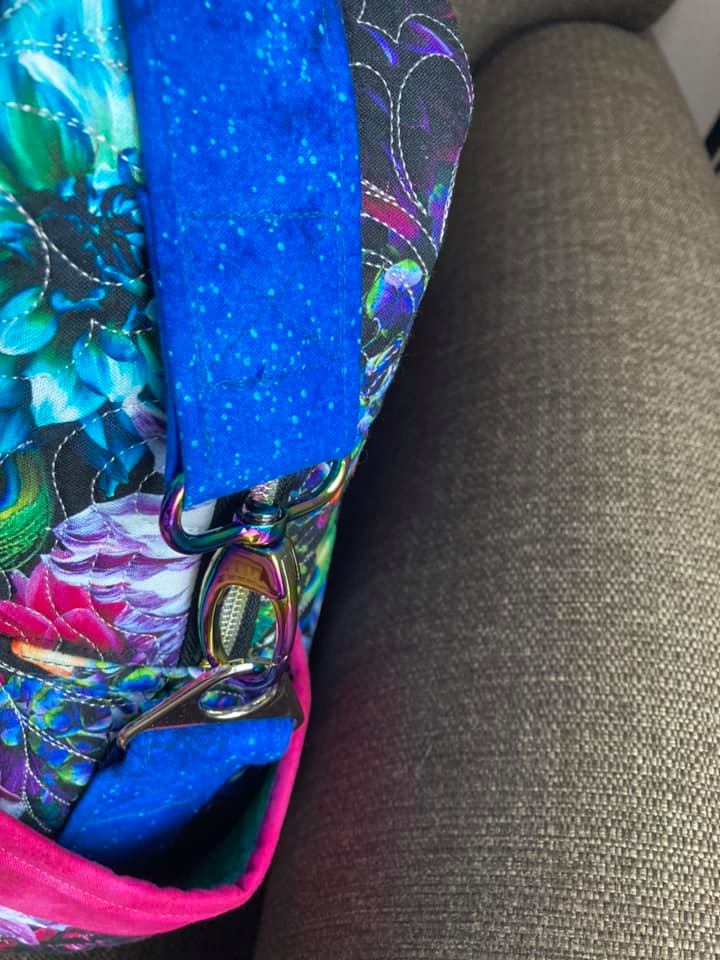
Hardware choices
I’m as picky about the hardware as I am about my fabric choices. With some bags, the hardware really pulls them together, or stand out as “meh” choices. You can buy good hardware many places online, but I tend to stick with Emmaline Bags. (again, not an affiliate, just a happy customer)
I have quite the stash of zippers, pulls, hooks, and more, so I was able to find the perfect hardware for this bag. This iridescent style, which you can see more clearly with the zippers, adds a nice touch.
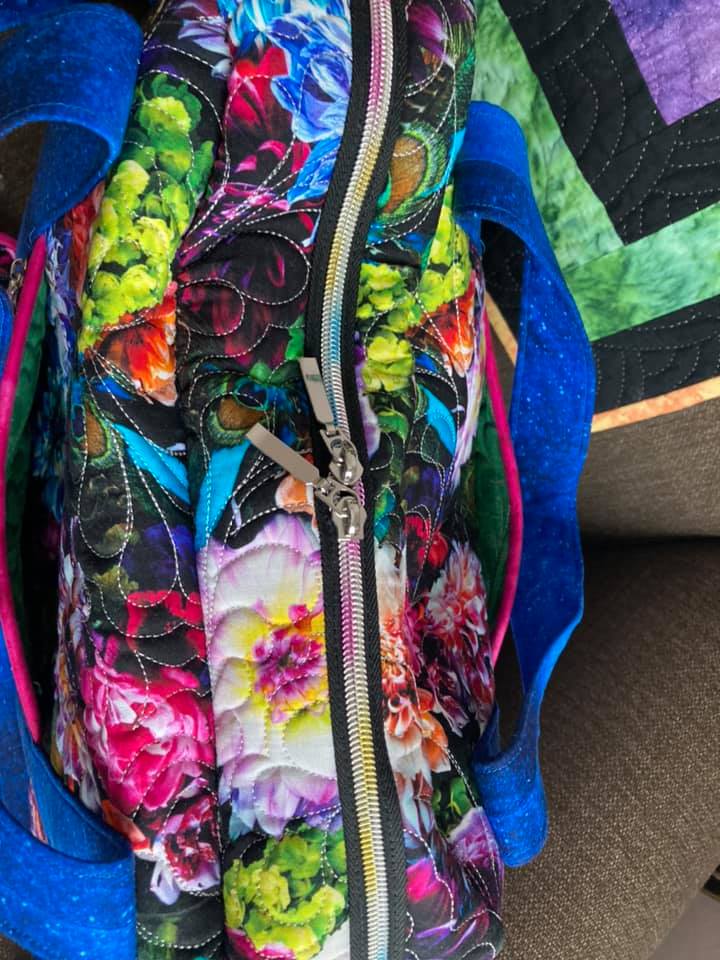
Bag designers will have a preference about what width zipper you use and they build that into their pattern. Be careful when choosing a zipper because you need it to fit. And keep in mind the purpose of that zipper. A zipper that closes a bag will take more wear-and-tear than an inside pocket zipper. So I am careful to use a good quality, strong zipper on the outside, and maybe a cheaper nylon one inside.
I am looking forward to actually using this beauty. And now that I’ve made this one, I know what adaptations I will make when I put my second one together.
Do I need two travel bags? Of course not. But if I make both, I can choose which one I want to use when I want to use it. Or I may give one away. Who knows?
Have you ever sewn a bag? Do you have a favourite design or designer?