
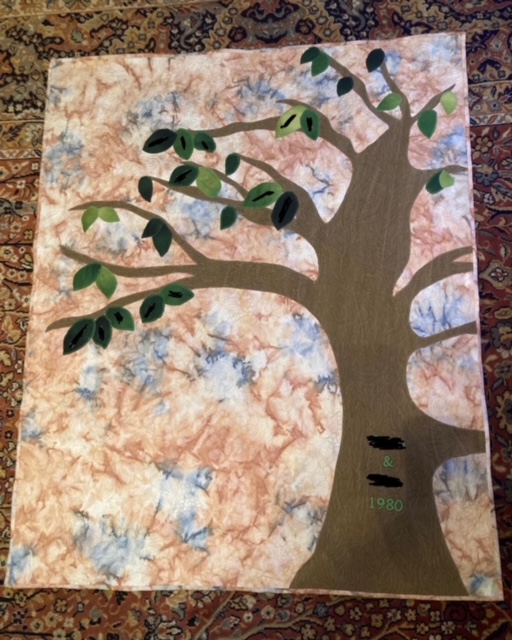
I can finally write about this family tree quilt! I wanted to make this quilt for a dear friend for a good while now, but I had to wait until her kids stopped having kids. 😊
For privacy purposes, I blocked out the names on the leaves, but you can still see the beauty of the quilt.
The Design
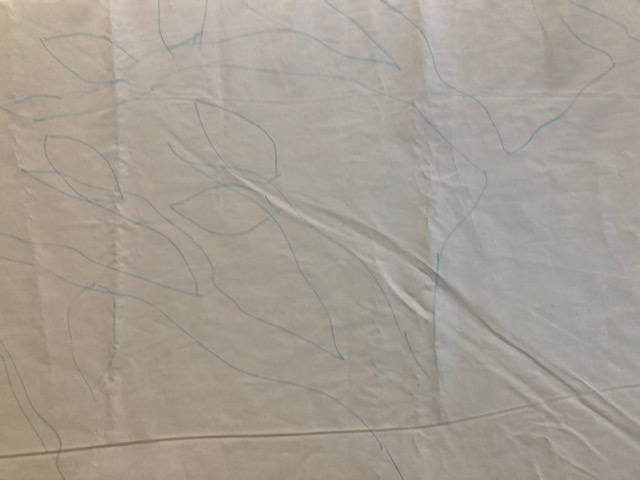
I didn’t have a pattern for this quilt. Instead, I took a big piece of muslin the same size as what I wanted the quilt to be. Using a water-soluble marker so I could make adjustments if needed, I drew a tree outline on muslin. Once I was happy with the tree shape, I transferred the pattern onto freezer paper.
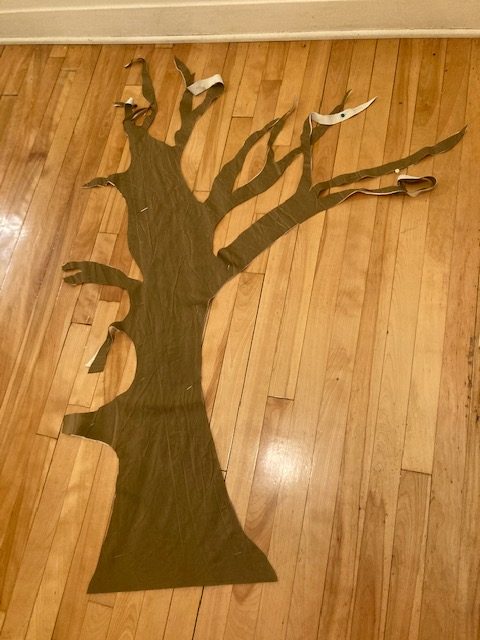
I prepared the brown fabric by pressing on some Heat-n-Bond and then pressed the freezer paper onto the other side of the fabric. Next was cutting out the tree and positioning it on the background fabric.

Setting this aside, I moved on to the leaves.
Preparing the Leaves
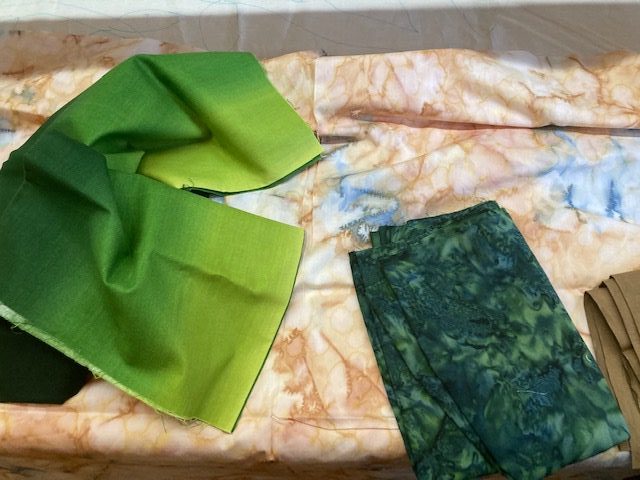
I didn’t want all the leaves to be the same shade of green, so I used this lovely ombre green fabric I’d been saving for a special quilt. I auditioned the green batik in the photo, but I settled on just the ombre.
I cut out 3- or 4-inch loose shapes, stabilizing the fabric with more Heat-n-Bond. Once the pieces were prepared, I embroidered the names of my friend’s children, their spouses, and their own children using an alphabet from the basic embroidery function on my sewing machine. Most electronic sewing machines have at least one alphabet in their embroidery library, so there weren’t any special equipment or computer programs needed. I didn’t want the tree to look too sparse, so I needed more leaves than just the number of names I had. I didn’t have a specific number in mind – I just cut out the extra leaves until I thought I had enough.
Once the names were embroidered on the green pieces, I cut leaf shapes around the names (and the extras), and then separated them into piles per family.
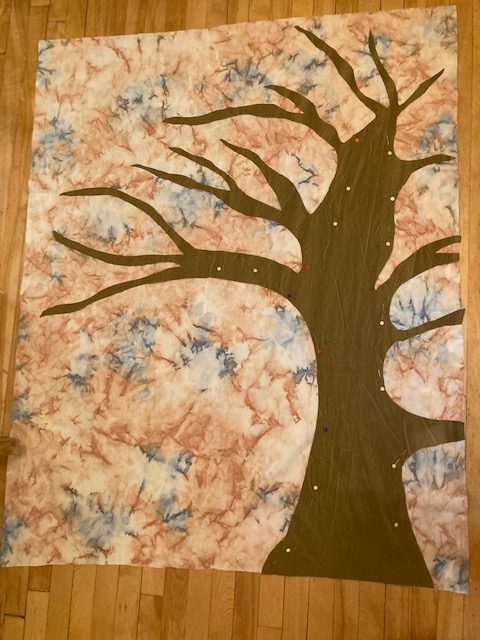
The Tree
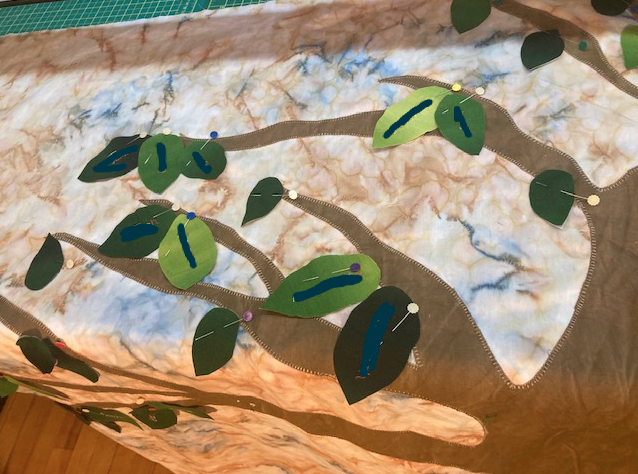
Before placing the leaves, I stitched down the tree, using a medium size blanket stitch. Then I took the leaves and started placing them where I thought they would fit best, keeping the family groupings together. It took some fiddling around until I was happy. Once I was, I removed the backing and pressed the leaves down, as I did with the tree trunk.
No matter how well I press down my appliques (on any project), some start lifting up because of how the quilt top is moved around under the needle as I’m stitching. To prevent losing leaves or having branches fold over while stitching, I stuck pins in each leaf and on many branches. Of course, while this was effective in keeping the fabric in place, it was also a great way to get poked a lot as I moved the quilt top under the needle – so I had to be really careful. (Anyone want to guess how many times I poked myself anyway?)
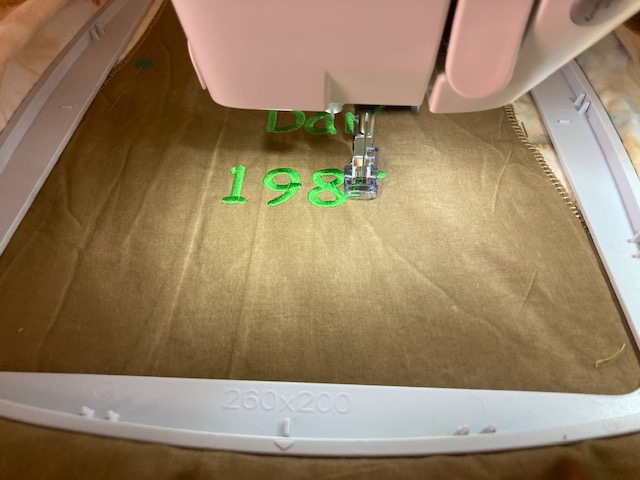
At this point, my friend’s name – which was to be on the trunk – was not yet embroidered on. I decided to wait until the whole top was ready before doing that part.
The Final Embroidery
Now that the tree and the leaves were stitched down, it was time for the final embroidery – my friend’s name, along with her husband’s and the month and year of their marriage.
I waited until the tree was fully attached because I wanted to make sure the embroidery would be straight and in the best spot on the trunk. I was worried that if I did it earlier, it might have been off-center or just not in the right place. I chose to use the embroidery module on my machine for this part. I wanted a particular style font that wasn’t installed on my machine.
Once these names were done, it was time to quilt this family tree.
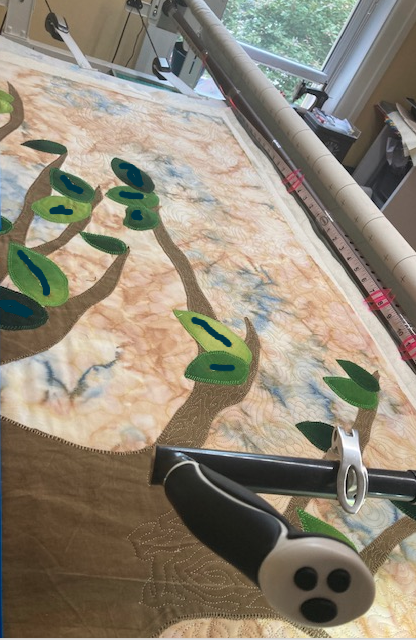
Quilting
I don’t have robotics on my machine. All my work is freehand or ruler work. I chose to use a wood-style stitching design for the tree trunk and graffiti-style quilting for the background. I didn’t do any quilting on the leaves. I thought that might get a bit much and take away from the names.
Then I bound the quilt with the background fabric, added the label and waited, and waited, and waited, until I could give my friend her gift.
I am so good at not opening gifts for me if I’m told to wait. Someone can give me a wrapped gift and say, “don’t open it until two weeks from now,” and I will do exactly that. No peaking, nothing. I’ll wait. But if I have a gift to give, I don’t want to wait – I want to give it to them now! How odd is that?
Anyway, I gave the quilt to my friend earlier this week and I was glad to see how happy she was. And I was so glad that I have the skills, time, and ability to get what I need to make these beautiful things.