
From what I’ve heard over the years, many new and even intermediate quilters have no idea how they are going to quilt their quilt tops. “Quilt as desired,” which is what many patterns say, strikes fear into many a new quilter’s heart. To help overcome the “how shall I quilt this” jitters, I’ve started a series called, How Did I Quilt That. There is a short (about 2 minute) video with each one. I hope you find them helpful. Today, we start with one of my fun wall hangings, Here Fishy, Fishy
This quilt was the result of a gift from a friend in Atlanta. She sent me some lovely batiks and blenders with a note that said she’d love to see what I can do with them.
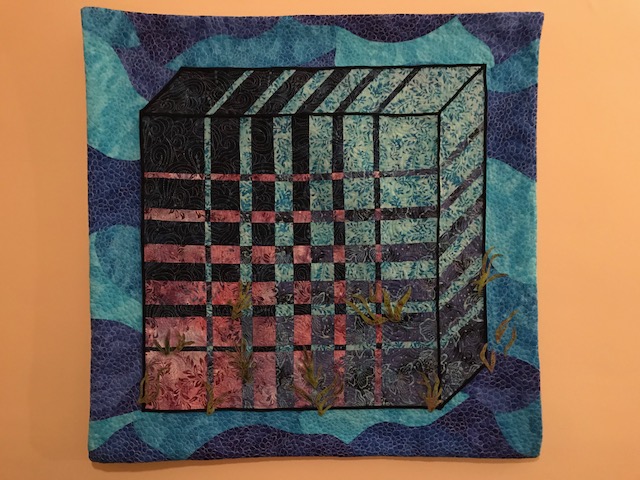
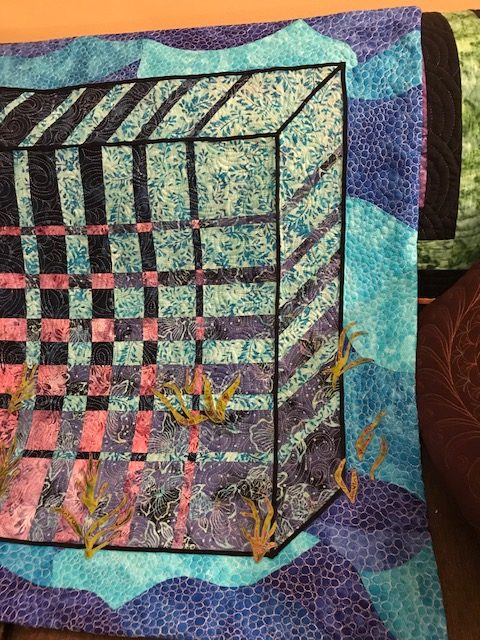
I love the color blue and its various shades, so I took on this challenge with relish. The batik fabric made me think of water, and one had fish in the design. I had just attended a Ricky Tims two-day event in Burlington, VT, Quilt Luminarium, so I decided that the batiks called for this Convergence technique. Once that was done, I took the blue blenders and fashioned the borders. Then, as a final touch, I appliqued seaweed. Now, on to quilting my new piece, machine quilting.
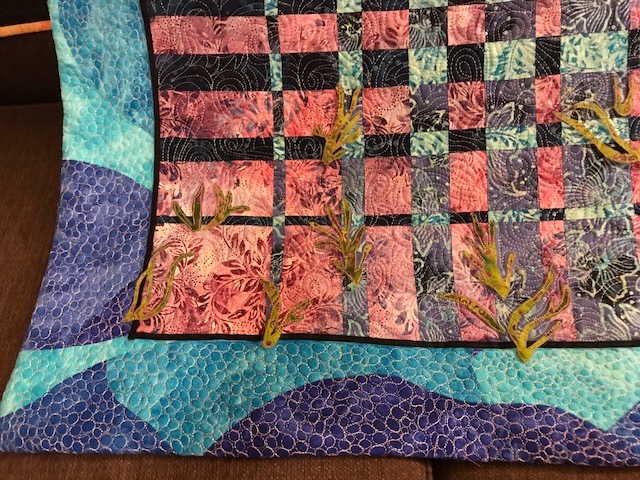
Inside the “aquarium” was an easy choice for me. I wanted to do a design that mimicked water. I quilted around the seaweed, using trapunto so it popped out a bit. But what to do with the border? I saw bubbles, but that was going to take a long time to quilt. I looked at the top some more and thought about it. But the bubbles made most sense. So, I set about to quilt bubbles. And quilt bubbles. And quilt more bubbles. But, before I knew it, the bubbles were finished and it was a perfect choice. I found it made the quilt.

Notice the facing, instead of binding.
Finally, I decided not to bind the piece as I felt it would take away from the design. I did a facing instead. To do a facing, prepare as you would for binding, but make the binding strip much wider. I think I did six inches or so. Attach the binding/facing as usual, to the front of the quilt. When attached, instead of pulling it back so the strip covers the edge like a binding, pull it completely back so none of the strip is showing and sew it down as you would a binding. Now, there’s a nice finished edge along all sides.
I do love this wall hanging. The colors are gorgeous and I think the quilting really made it what it is.