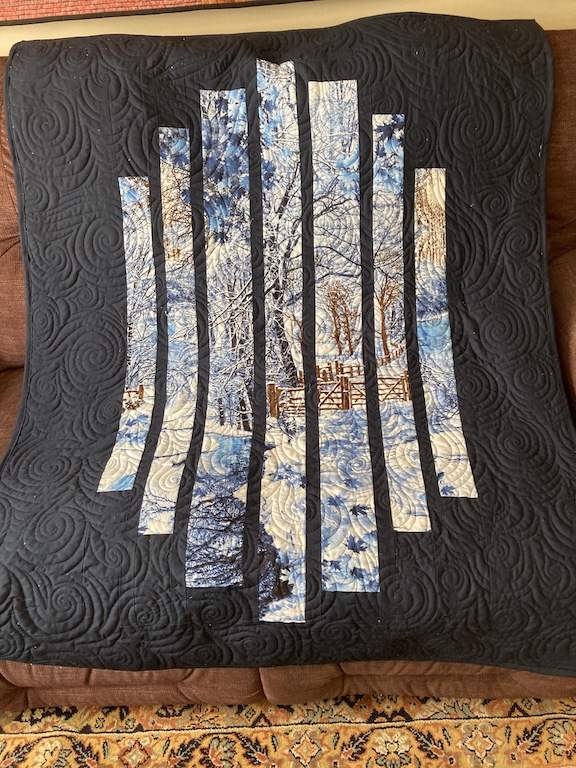
Do you have a panel or a smaller piece of gorgeous fabric you don’t know what to do with? I’ve got a fast and easy project for you. Staggered Windows, as I call it, can make anything from a wall hanging to a large bed quilt. The end size depends on what panel/focus fabric you use and how large you make your strips.
This technique is also not my idea. I’ve seen many quilts over the years in a similar style. I studied them and came up with my own technique, so you may find different explanations from other quilters.
The video below shows how I put together a top, with more detail as I explain.
Choose a Panel
The panel or fabric you choose can have pretty well any size design on it. If you’re not sure how yours will look cut into strips, cut up a few pieces of scrap white or black fabric (or paper) in strips the length of the panel, about an inch wide. Place them across the width of the panel, running down. Then step back and have a good look at it. Or, take a photo and study that. I find looking at photos really helps put things in perspective.
Choose the Background
Technically, the background can be any fabric you want that complements the panel. Personally, I stay away from busy backgrounds as I don’t want to take away from the panel. I often use solids, but I may use small prints or subtle textures.
Cut the Panel
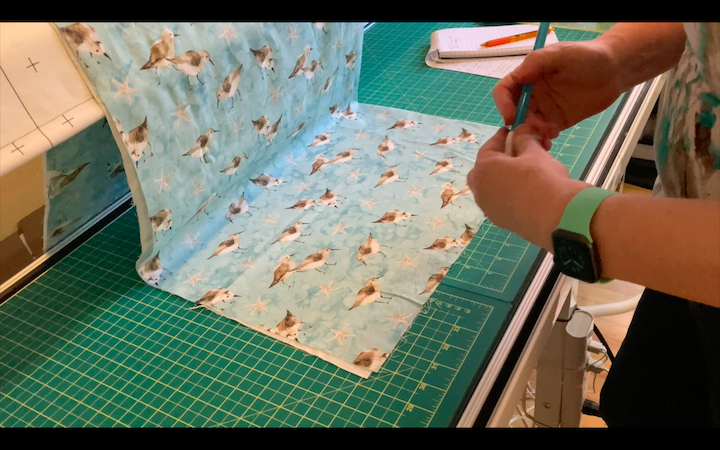
Ensure the panel is square – not square as in 20” by 20” – but square in that the corners are all 90 degrees and the top and bottom are the same width and the sides are the same length.
Remember: Once the strips are cut, we will always be working with them folded in half when cutting the tops and bottoms off. This is to ensure consistency – that the top and bottom pieces will always be the same size.
Decide how wide you want your quilt to be and how many panel strips you want to use. I usually use 7 or 9. I chose to cut center strip at 3”, which would give me 2.5” when it’s sewn together. Remember that you lose a quarter inch off each side in the seam allowance.
Mark 1.5” from the center.
Then mark the next strip, and the next, and the next, until you’ve marked four in addition to the center strip.
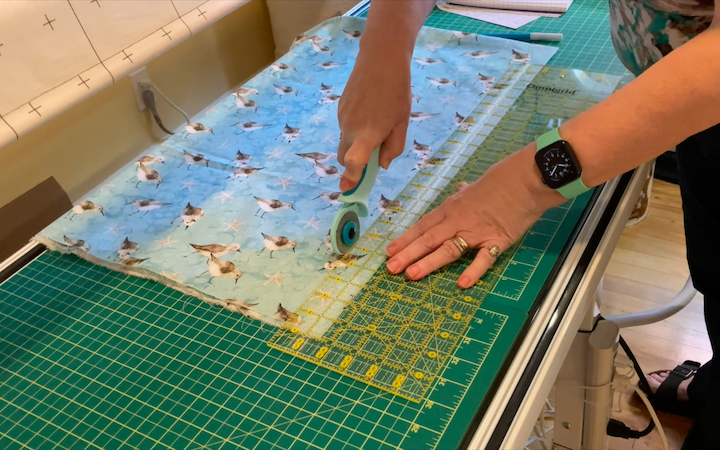
Cut the strips. Do NOT move them. We need to label them first because I can almost guarantee that if you don’t, you will end up sewing at least one strip either upside down or on the wrong side. I mark center, L1, L2, L3, L4 for the left strips and R1, R2, R3, and R4 for the right. I always put my marks on the bottom of the strip, so I know right away which side is up.
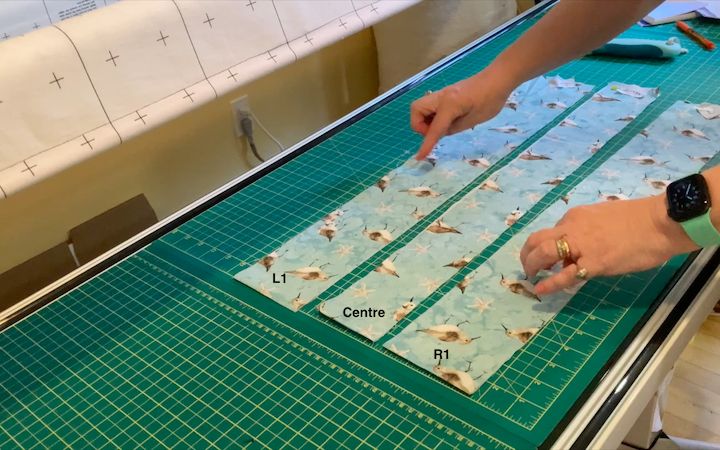
Set Up the Strips
Open the strips. Place them on your design wall, floor, bed… Now we need to decide how steep you want the cuts on the panel to go.
I usually pick mine to drop 3 inches on strip 1, 2.5 inches for strips 2 and 3, and then sometimes 2.5, sometimes 2 for the final strip.
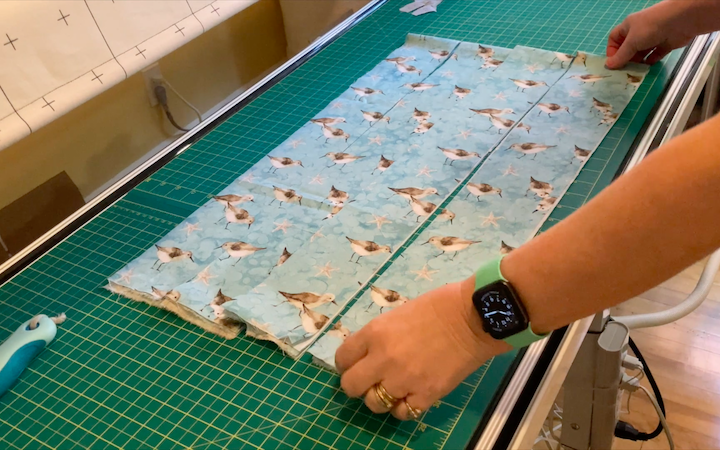
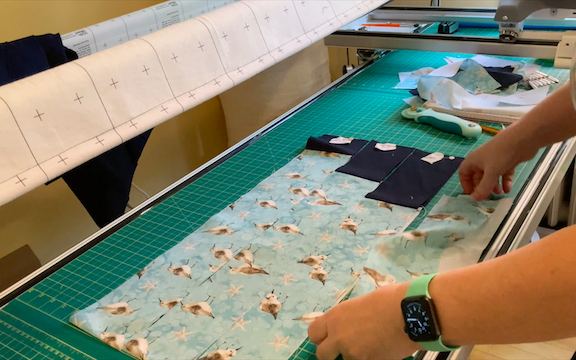
Take the center strip and L1 and R1 to your pressing surface. Fold the strip in half and press well to mark the center. Now, to the cutting table.
To ensure we are consistent, we need to work with coordinating strips together and always folded.
Place the center strip on the cutting board. Place L1 and R1 beside it, lined up. Trim the strips so they are all even, if needed.
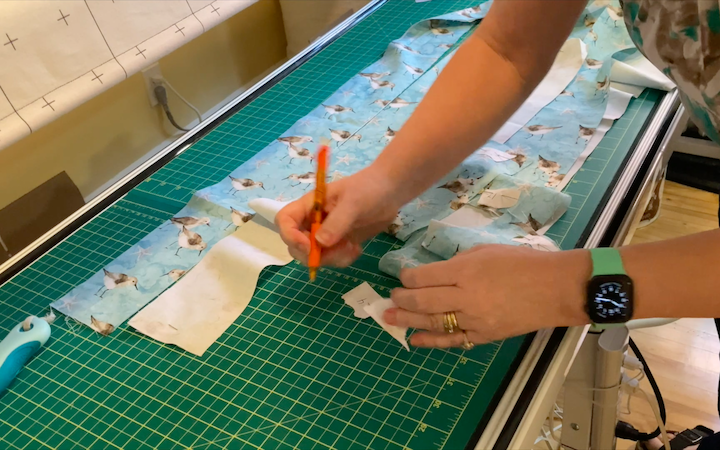
Move the center strip away and cut off 3” off the end of L1 and R1. Because you have folded it in half, you are cutting the top and bottom equally. Set aside the scrap and place the strips on your board.
Now take L2 and R2 strips, press the center mark so they are folded in half. We want L2 and R2 to be 2.5” shorter. We cut off 3” from the first piece, so 3” plus 2.5” equals 5” that we will cut off these two strips.
Place these strips on the board. Repeat the process with L3 and R3. We want another 2.5” off, so we take the 3” from L1, plus 2.5” from L2 and add another 2.5” for a total of 8.5” we are cutting off L3 and R3.
Finally, we take L4 and R4 and take another 2.5” off. That is 8.5” plus 2.5”, for a total of 10.5”.
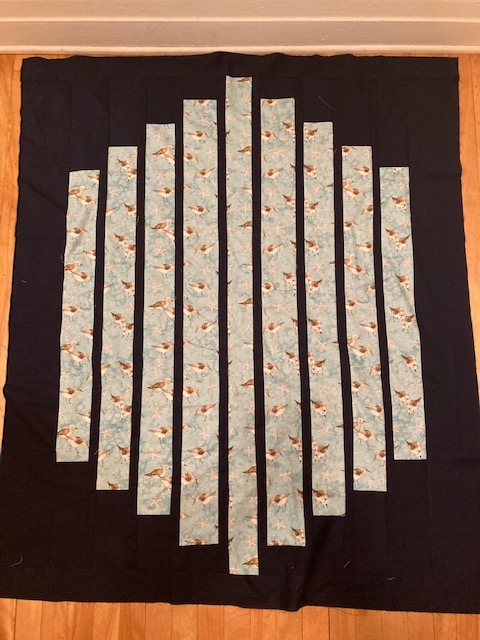
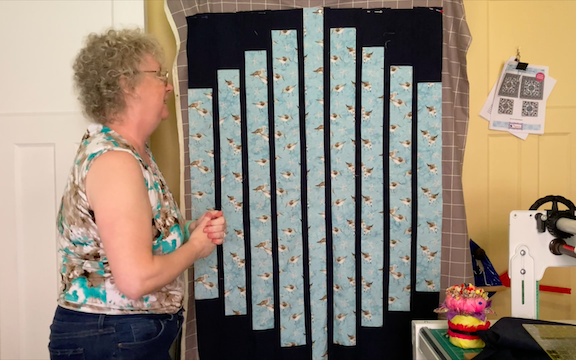
Progress!
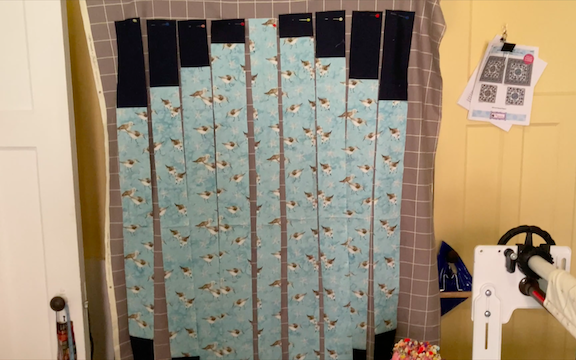
Check out the strips – look at how they go up and down as they sit across the width.
Background Pieces
Now, we need to make the L and R strips the same length as the center piece.
Lay the center strip, in half still, on the cutting board. Take L1 and R1, place them beside the center strip. Measure the center strip from the fold to the end. In this case, it is 24.5 inches. This is what the side strips need to be.
Measure the width of the L1 and R1 strips. Then, with the L1 and R1 next to the center strip, measure from the end of the L1 and R1 to the end of the center strip. It should be 3”. So we need to cut four 4” by 3.5” pieces. The 4” is for the width, matching the strip width. The second 3.5” is for the length we are adding on. Don’t forget that you lose a quarter inch in the seam allowances.
Sew them to each end, remembering to keep the labels on the end of each strip.
Put the center strip and R1 back on the board. Leave L1 on the cutting table for reference. Take L2 and R2, repeat the process. Meausure the width, 3.5” again in this case. Lining up L2 and R2 with L1, measure the end of L2 and R2 to the end of L1. In this quilt, it should be 5”. Cut four 3.5” by 5.5” pieces, sew them to the ends.
Repeat this with the rest of the strips until they’ve all been made the same length.
Sashing
The sashing can be any width, but I tend to stick to 1”, which means I have to cut them 1.5”. If you have 9 panel strips, you need 8 sashings, 11 panel strips means 10 sashings.
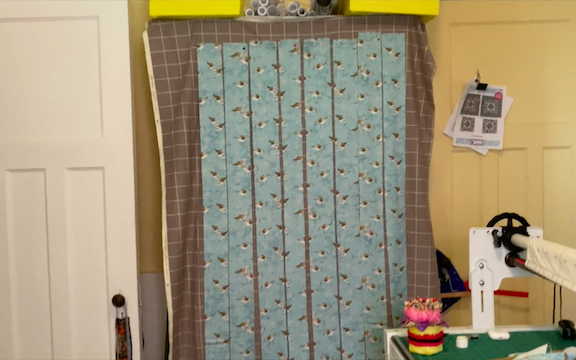
Sew the sashings to the strips and then all together.
We’re almost there! Now we need the borders.
Calculating Borders
This is where you get to make the quilt as big as you want it to be. If the strips sewn together come out to about 35’, but you want a 45” quilt, then you add 5” on each side. You also need a narrower border on the top and bottom. I usually do 2” or 3”.
Sew them together and you are all done. Congratulations!